Upgrading my System Center Service Manager 2012 Lab to 2012 SP1
Pre-requisites
Before you start anything, make sure you have at least Service Manager CU2 applied to your installation.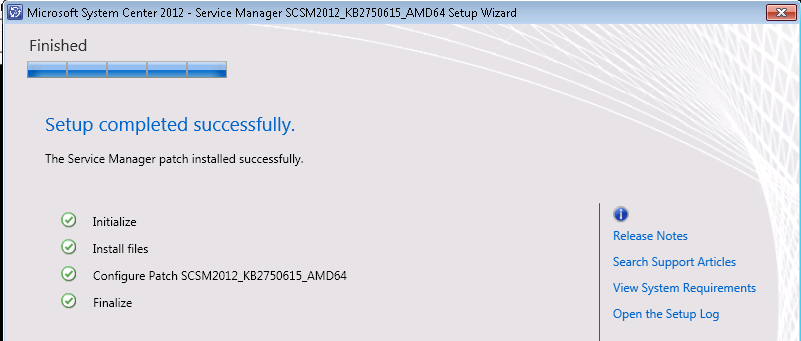
SP1 Preparations
http://technet.microsoft.com/en-us/library/jj900186.aspxI have used the Microsoft original steps as a reference and added my comments when I found necessary.
--------------------------------------------------------
This topic describes how to prepare your System Center 2012 – Service Manager environment for an upgrade. To do this, perform the following procedures for upgrading the data warehouse management server:
1.List the data warehouse jobs that are running.
2. Disable the data warehouse job schedules.
3. Confirm that the data warehouse jobs have stopped running.
When the data warehouse jobs have completed, start the upgrade of the data warehouse management server.
After the data warehouse has been upgraded, perform the following procedures on the first Service Manager management server:
1. Wait 10 minutes, and then start the upgrade of the Service Manager management server.
Detailed Steps
To list the data warehouse jobs by using Windows PowerShell cmdlets
1.On the computer that hosts the data warehouse management server, click Start , click All Programs , click Microsoft System Center 2012 , and then click Service Manager Shell .
There doesn’t seem to be a Service Manager shell on the DW server. I may have not installed it, it’s been a while and I can’t be sure. However, you can open a regular Powershell console and the steps work.
2.Type the following commands, and then press ENTER after each command:
Set-ExecutionPolicy –force RemoteSigned
cd 'C:\Program Files\Microsoft System Center 2012\Service Manager'
Import-Module .\Microsoft.EnterpriseManagement.Warehouse.Cmdlets.psd1
Get-SCDWJob | ft Name, Status
(I added the “| ft Name, Status”, otherwhise you get a lot of unnecessary information).
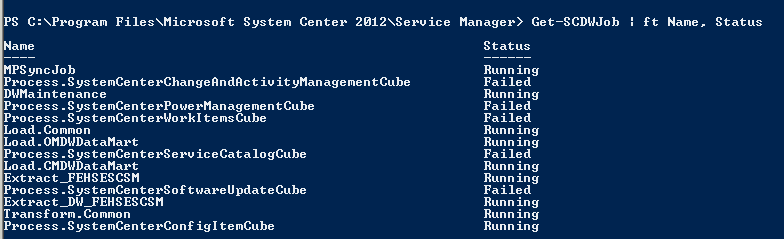
3.A list of the data warehouse jobs appears. Use this list in the next procedure, "To disable data warehouse job schedules by using Windows PowerShell cmdlets.”
To disable data warehouse job schedules by using Windows PowerShell cmdlets
1.Type the following commands, and then press ENTER after each command:
Disable-SCDWJobSchedule –JobName Extract_<SCSM_ManagementGroupName>
Disable-SCDWJobSchedule –JobName Extract_DW_< SCSM_ManagementGroupName >
Disable-SCDWJobSchedule –JobName Transform.Common
Disable-SCDWJobSchedule –JobName Load.Common
Disable-SCDWJobSchedule –JobName DWMaintenance
Disable-SCDWJobSchedule –JobName MPSyncJob
Start-SCDWJob –JobName MPSyncJob

The last command to start the MPSyncJob will enable the extraction, transformation, and load (ETL) jobs to run to completion. After that, because all the schedules have been disabled, the jobs will stop. To close the Windows PowerShell window, type exit .
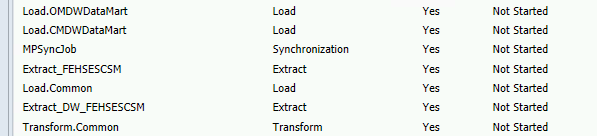
To confirm that the data warehouse jobs have stopped running
1.In the Service Manager console, click Data Warehouse .
2.In the Data Warehouse pane, expand Data Warehouse , and then click Data Warehouse Jobs .
3.In the Data Warehouse Jobs pane, observe the Status column for each data warehouse job. When the status for each job is listed as Not Started , proceed to the next procedure to stop the Self-Service Portal. If no Self-Service Portal exists in your environment, you can start the upgrade process in How to Upgrade to System Center 2012 SP1 - Service Manager.
Stopping the service portal
Since I couldn’t find the exact procedure, I assumed that shutting down the server completely could do the trick. We will see.
Data Warehouse Management Server
Use the following procedure to upgrade the data warehouse management server.| *Important |
Make sure that you have stopped the data warehouse jobs before you continue. For more information, see How to Prepare Service Manager 2012 for Upgrade to SP1.
|
To upgrade the data warehouse management server
- Log on to the computer that will host the data warehouse management server by using an account that is a member of the Administrators group. This account must also be a local administrator.
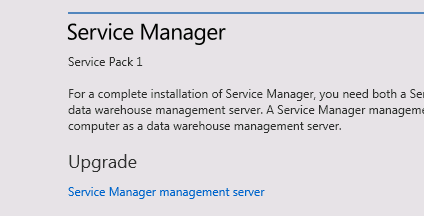
- On the Service Manager installation media, double-click the Setup.exe to start the Service Manager Setup Wizard.

Here’s what I’ve got:
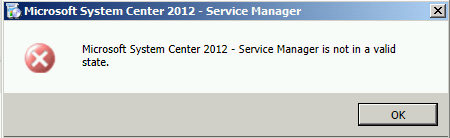
Now, what is that?!?
Found this article. It may help, but it didn’t seem to be my case:
Ok. Started over. Moved my VM to a better host and restarted the DW Server. It seems to be moving:
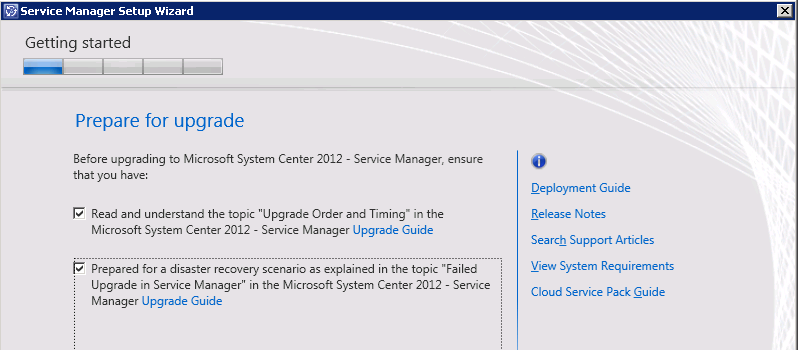
- On the Microsoft System Center 2012 page, click Upgrade Service Manager data warehouse management server .
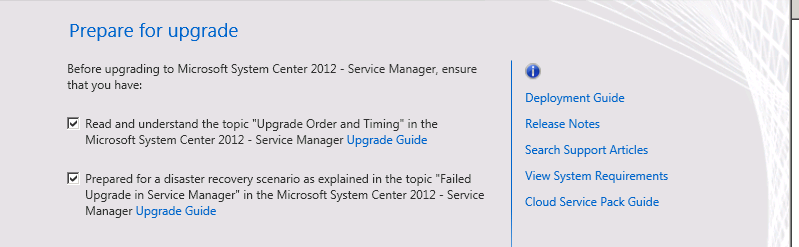
- On the Prepare for upgrade page, select the two items indicating that you have read the appropriate sections in the System Center 2012 – Service Manager Upgrade Guide, and then click Next .
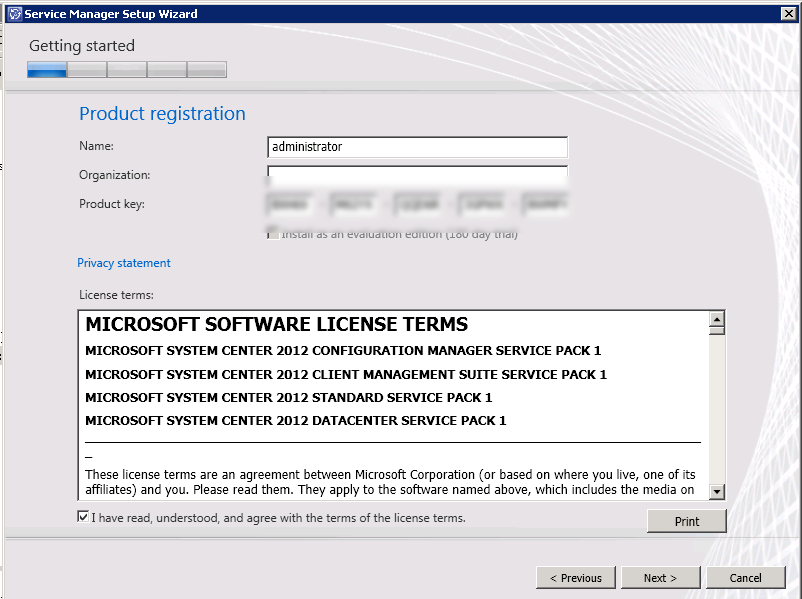
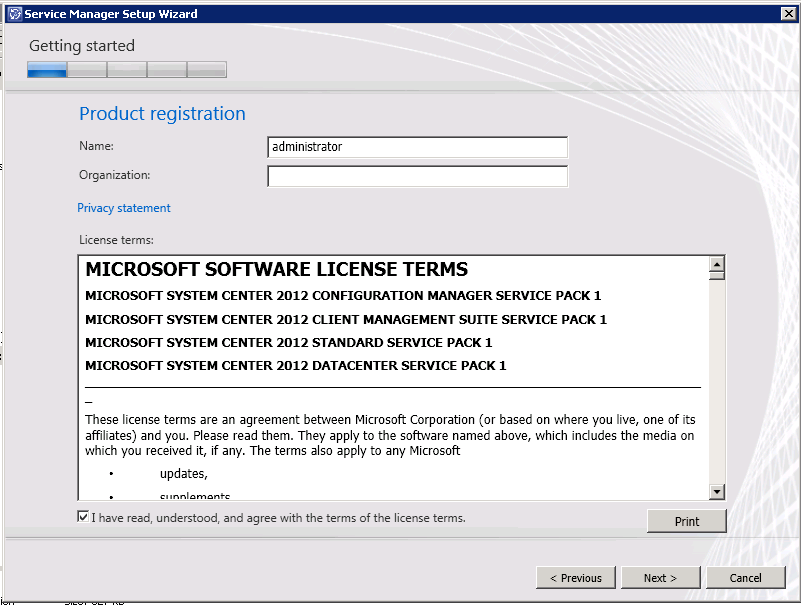
- On the Product registration page, type the appropriate information in the boxes. Read the Microsoft Software License Terms; if applicable, click I have read, understood, and agree with the terms of the license agreement ; and then click Next .
- On the System check results page, ensure that the prerequisite check passed or at least passed with warnings, and then click Next .

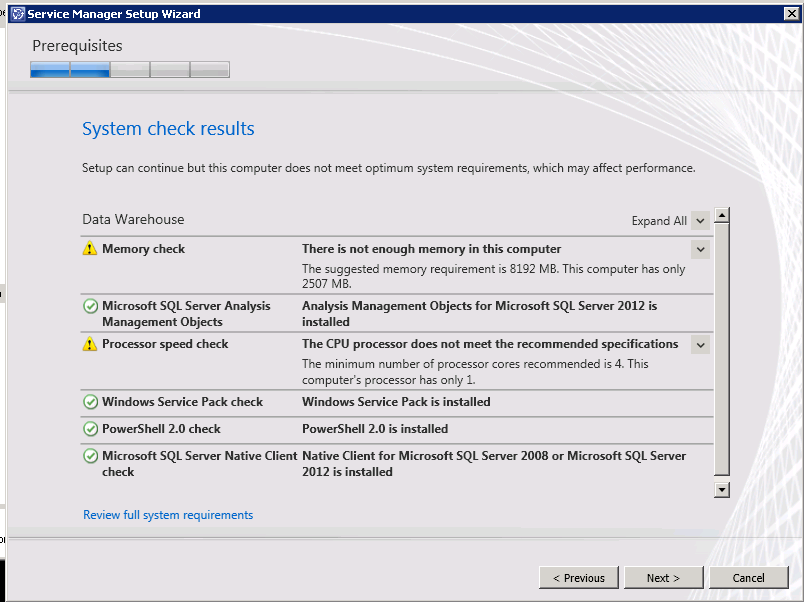
It’s a lab, guys! ;)
- On the Configure Analysis Service for OLAP cubes page, in the Database server box, type the computer name of the server that will host the SQL Server Analysis Services (SSAS) database, and then press the Tab key. When Default appears in the SQL Server instance box, click Next .
Well, this question didn’t show up for me. Let’s see how it goes.
If you are installing SSAS on a computer other than the computer that hosts the data warehouse management server and there is a firewall in your environment, you must make sure that the proper firewall ports are opened. For more information, see “Port Assignments for System Center 2012 - Service Manager” in the Planning Guide for System Center 2012 - Service Manager.
|
- On the Configure Analysis Services credential page, specify the user name, password, and domain for the account, and then click Test Credentials . After you receive a message saying “The credentials were accepted,” click Next .
- On the Help improve System Center page, indicate your preference for participation in the Customer Experience Improvement Program and in Error Reporting. As an option, click Tell me more about the program , and then click Next .
Nope…
- On the Use Microsoft Update to help keep your computer secure and up-to-date page, indicate your preference for using Microsoft Update to check for Service Manager updates, and then click Next
Nope....
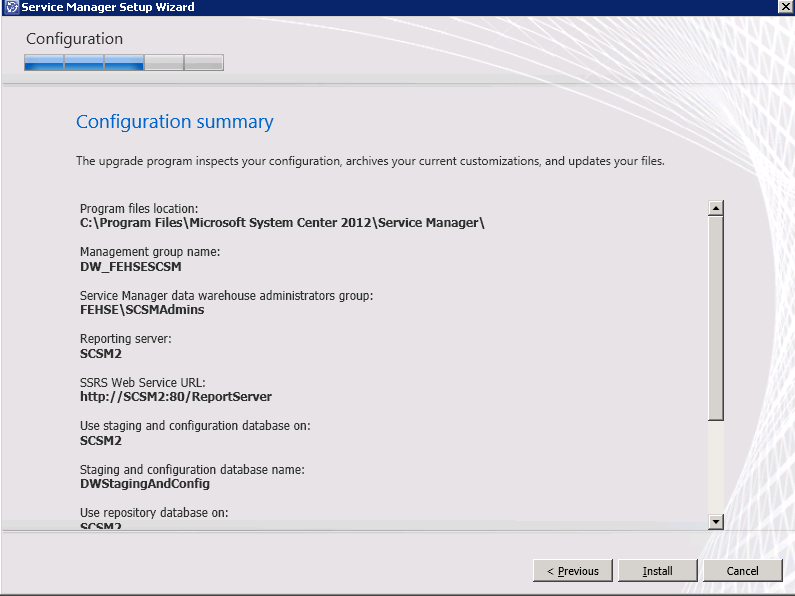
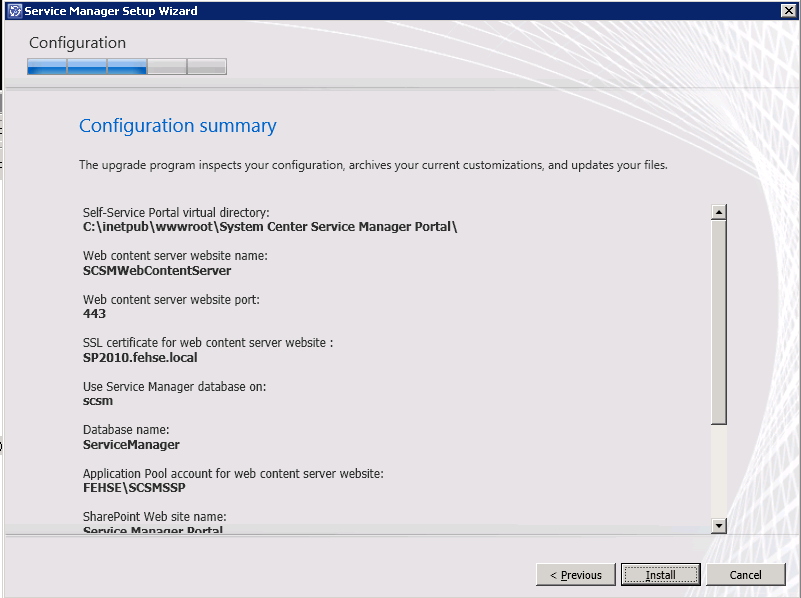
- On the Configuration Summary page, read the information that is provided, and, if it is accurate, click Install .
- On The upgrade was completed successfully page, if you have already backed up the encryption key, clear the Open the Encryption Backup or Restore Wizard check box, and then click Close .
Well, surprisingly fine!
Let see how the Management Server goes:
Service Manager Management Server
Use the following procedure to upgrade the Service Manager management server.
To upgrade the Service Manager management server
- Log on to the computer that will host the Service Manager management server by using an account that is a member of the Administrators group.
- On the Service Manager installation media, double-click the Setup.exe to start the Service Manager Setup Wizard.
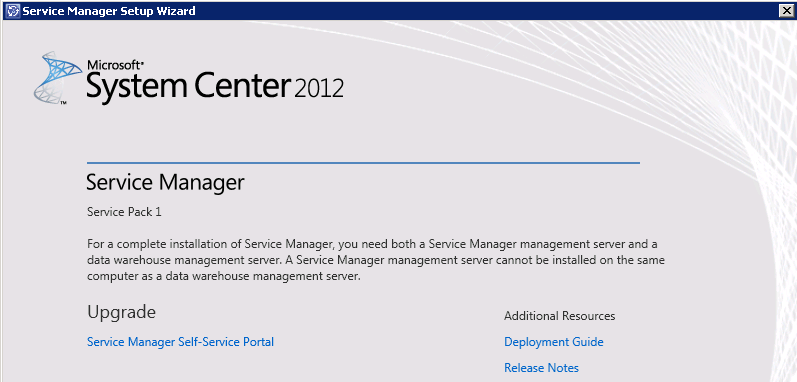
- On the Microsoft System Center 2012 page, click Upgrade Service Manager management server .
- On the Prepare for upgrade page, select the two items indicating that you have read the appropriate sections in the Upgrade Guide for System Center 2012 – Service Manager, and then click Next .
- On the Product registration page, type the appropriate information in the boxes. Read the Microsoft Software License Terms, and, if applicable, click I have read, understood, and agree with the terms of the license agreement , and then click Next .
- On the System check results page, ensure that the prerequisite check passed or at least passed with warnings, and then click Next .
Got this:
I was pretty sure I had this installed earlier, but let’s try to install it again.
Well, I had the 2008 objects but not the 2012 ones. So, point to the setup program!
Rebooted…
I will I could say exactly why it worked now, but there you go!
- On the Configuration Summary page, read the information that is provided, and, if it is accurate, click Install .
- On the The upgrade was completed successfully page, if you have already backed up the encryption key, clear the Open the Encryption Backup or Restore Wizard check box, and then click Close .


Success! It works.
Service Manager Console
Use the following procedure to upgrade the Service Manager console, if you have any consoles besides the one on the server.
To upgrade the Service Manager Console
- Log on to the computer that will host the Service Manager console by using an account that is a member of the Administrators group.
- On the Service Manager installation media, double-click the Setup.exe to start the Service Manager Setup Wizard.
- On the Microsoft System Center 2012 page, click Upgrade Service Manager console .
- On the Prepare for upgrade page, select the two items indicating that you have read the appropriate sections in the Upgrade Guide for System Center 2012 – Service Manager, and then click Next .
- On the Product registration page, read the Microsoft Software License Terms, and, if applicable, click I have read, understood, and agree with the terms of the license agreement , and then click Next .
- On the System check results page, ensure that the prerequisite check passed or at least passed with warnings, and then click Next .
- Make sure you have the SQL Server 2012 Analysis Management Objects installed and the machine is rebooted after you install it, otherwise the setup won’t recognize it.
- On the Configuration Summary page, read the information that is provided, and, if it is accurate, click Install .
- On The upgrade was completed successfully page, click Close .

Upgrading the Self-Service Portal
Although I couldn’t find an upgrade document from MS right now, I thought it would make sense to upgrade the Self-Service portal as well. Here’s how I did it:
- Log on to the computer that will host the Service Manager Self-Service Portal by using an account that is a member of the Administrators group.
- On the Service Manager installation media, double-click the Setup.exe to start the Service Manager Setup Wizard.
- On the Microsoft System Center 2012 page, click Upgrade Service Manager console .
- On the Prepare for upgrade page, select the two items indicating that you have read the appropriate sections in the Upgrade Guide for System Center 2012 – Service Manager, and then click Next .
- On the Product registration page, read the Microsoft Software License Terms, and, if applicable, click I have read, understood, and agree with the terms of the license agreement , and then click Next .
- On the System check results page, ensure that the prerequisite check passed or at least passed with warnings, and then click Next .
- On the Configuration Summary page, read the information that is provided, and, if it is accurate, click Install .


- On The upgrade was completed successfully page, click Close ..

No big issues with the upgrade!
Hope it helps!
Hope it helps!
Addendum:
Noticed a few side effects: I've left the machine with
unlimited memory (1TB, although I only have 48 on my HV host). After 24 hours,
the SC msmdsrv.exe service is taking 15 Gb of memory, although there is
basically no activity. It seems to be going up and up, nonstop. Memory leak?
After a reboot and limiting the memory on the machine, it
seems things are normal. However, the services failed to start initially. I had
to do some exercise in starting the data access and restarting the Management
and configuration management services, otherwise the Lfx service would refuse
to start properly.